Translate

Saturday, December 29, 2018

Domain-Driven Design in JavaScript


Let DDD bring order to your JavaScript chaos

Credits to: Ewan Valentine
Source: https://dzone.com/articles/domain-driven-design-in-javascript


I wouldn't class myself as a JavaScript developer, I always joke that it's a language I never meant to learn. It's so pervasive now, it just happened. I go through phases of enjoying it and despising it. But through the peaks and troughs of love and not quite hate. One problem persisted: if I'm to be a good JS developer and write functional JavaScript, how then do I write code in a way that implies a proper domain model?

In traditional OO languages, such as Java, C#, and even Go actually, it's easy to write code that's architected around a domain design. You have classes, which are big and do a lot of stuff. Which of course is something you generally avoid like the plague in JavaScript, for fair enough reasons.

However, my code always seemed to end up looking like this:

const { getUser, removeUser } = require('services/user');

const { sendEmail } = require('helpers/email');

const { pushNotification } = require('helpers/notifications');

const { removeFilesByUserId } = require('services/files');

const removeUserHandler = await (userId) => {

  const message = 'Your account has been deleted';

  try {

    const user = await getUser(userId);

    await removeUser(userId);

    await sendEmail(userId, message);

    await pushNotification(userId, message);

  } catch (e) {

    console.error(e);

    sendLogs('removeUserHandler', e);

  };

  return true;

};


This looks okay, right? Sure! No big problems here design-wise. However, when you have a large codebase entirely made up of files such as this, in other words directories full of vaguely grouped 'services,' individually exporting and importing single functions, often vaguely named, and not obviously belonging to a domain when reading through the code, it can very quickly feel as though you're dealing with a big ball of unrelated scripts, rather than a well-architected software application.

I didn't want to return to classes and traditional encapsulation. It felt like a step back after learning 'the functional way™️. But, increasingly, I was finding JavaScript projects difficult to read, 'bitty' and fragmented. I was seeing this everywhere, too! It wasn't just my own hapless downfall. It seemed really common to see JS projects with little to no design or architecture. I was ready to toss JS into the bin for good and resume my position in the Golang ivory tower.

Until one of my engineers slipped a new feature into one of our most noisy codebases, which jolted my attention.

Peering through reams and reams of JavaScript, suddenly something stood out in a PR.

ScheduledJobs.run(jobId);

const job = await ScheduledJobs.get(jobId);


Huh. Is that, a class? Surely not. We don't do that here! No!

const run = (jobId) => {};

const stop = (jobId) => {};

const pause = (jobId) => {};

const get = (jobId) => {};

module.exports = {

 run,

 stop,

 pause,

 get,

};


Praise Dijkstra, they're just functions! Good old-fashioned functions. Suddenly I felt so, so very silly for deliberating, Googling manically for weeks and weeks, and posting lengthy diatribes on Twitter about how JavaScript was done; not fit for public consumption. When all I needed to do was use what JavaScript gave me for this exact purpose: modules! I got so caught up in trying to follow a paradigm that I forgot to be pragmatic.

If I refactored my first arbitrary example to use this pattern, in order to follow a domain design, maybe I'd have something more like this:

const UserModel = require('models/user');

const EmailService = require('services/email');

const NotificationService = require('services/notification');

const FileModel = require('models/file');

const Logger = require('services/logger');

const removeUserHandler = await (userId) => {

  const message = 'Your account has been deleted';

  try {

    const user = await UserModel.getUser(userId);

    await UserModel.removeUser(userId);

    await EmailService.send(userId, message);

    await NotificationService.push(userId, message);

    return true;

  } catch (e) {

    console.error(e);

    Logger.send('removeUserHandler', e);

  };

  return true;

};


This code tells me so much more already!

I began writing my JavaScript in this way, centered around these objects of grouped functions, which can still be used in a functional way. But this pattern communicates purpose much better than dealing in lots of single, un-grouped function calls. I find it made code easier to follow, having that indicator of where this piece of code fits into the bigger picture.

It was so simple in the end, and it was something I already knew, even something I had already used hundreds of times in the past. It all seemed so obvious! But it's easy to neglect concepts such as DDD in languages like JavaScript, especially when you're on the pursuit to functional enlightenment! But there is a happy medium.


Friday, December 28, 2018

Case Study: Insurance Portal Built Fast with Low-code Platform


Source: https://dzone.com/storage/assets/9818229-case-study-axa-outsystems.pdf

AXA, the #1 ranked global insurance company, wanted to strengthen relationships with independent brokers by providing them with immediate online access to customer claims data from any device. In addition, they needed a new platform to drive legacy system modernization. AXA made brokers and customers happy (and reduced costs) by building an insurance portal for brokers in 3 months using the OutSystems low-code platform.

Challenge:

AXA needed a broker portal, fast. Independent brokers with AXA Commercial Lines expected easy online access to their customers’ claim infor - mation from any device. Instead, they had to call AXA’s overburdened customer service center and wait on hold. Concerned that brokers would move their busi - ness elsewhere, AXA called on its IT team to build an innovative insurance portal. But there was a catch. IT spent most of its budget maintaining ex - isting applications and aging legacy systems. How could the IT team build a broker portal quickly, with limited resources, that could be accessed by mobile phones, tablets and PCs?

AXA’s IT team turned to the OutSystems low- code development platform to help build enterprise-grade apps fast. They chose OutSystems for its:
  • Robust low-code development and application deployment in an amazingly short time-frame.
  • Open platform with no vendor lock-in , offering familiarity and portability.
  • Strength of integration between legacy systems and new applications, enabling system modernization.
Solution:
Armed with OutSystems, the IT team built the eServe insurance portal in just 3 months, about half the time it would take with traditional development methods. The platform enables the portal to integrate with AXA’s legacy system, an in-house platform based on Oracle and .NET. Now brokers can instantly retrieve their customers’ claim information 24/7 from a desktop, tablet or mobile device. No more threat of leaving for a better broker experience elsewhere! And calls to customer service have slowed, allowing AXA to greatly reduce call center costs. During the pilot program and again after rollout, brokers found the system intuitive and easy to use without special training.

“OutSystems enabled us to rapidly build eServe, a web-based insurance portal for our brokers that helps them better serve their customers and eliminates unnecessary processes and delays,” said Chris Voller, Director of Claims.

Even better, AXA launched a customer version of eServe that enables policyholders to directly access information about their claims – another boost to customer satisfaction.

Solution Capabilities:
  • Real-time status tracking of insurance claims for 3000+ brokers
  • Clear identification of suppliers allocated to claims (repair shops, for example)
  • Clear identification of the next steps and timelines in the workflow for each individual claim
Result:

Using OutSystems, AXA plans to continuously improve the eServe portal so it can provide additional benefits to brokers and customers. Since the plat - form is scalable, adding more brokers and more features isn’t a problem. And changes can be made without disruption.

Perhaps more importantly, OutSystems gave AXA the vision and means to achieve future legacy system modernization and digital transformation across the organization

Thursday, December 27, 2018

Providing Minimum Viable API Documentation Blueprints to Help Guide API Developers


Source: http://apievangelist.com/2018/09/13/providing-minimum-viable-api-documentation-blueprints-to-help-guide-your-api-developers/

13 Sep 2018


I was taking a look at the Department of Veterans Affairs (VA) API documentation for the VA Facilities API, and intending on providing some feedback on the API implementation. The API itself is pretty sound, and I don’t have any feedback without having actually integrated it into an application, but following on the heals of my previous story about how we get API developers to follow minimum viable API documentation guidance, I had lots of feedback on the overall deliver of the documentation for the VA Facilities API, helping improve on what they have there.

Provide A Working Example of Minimum Viable API Documentation
One of the ways that you help incentivize your API developers to deliver minimum viable API documentation across their API implementations is you do as much of the work for them as you can, and provide them with a forkable, downloadable, clonable API documentation that meets the minimum viable requirements. To help illustrate what I’m talking about I created a base GitHub blueprint for what I’d suggest as a minimum viable API documentation at the VA. Providing something the VA can consider, and borrow from as they are developing their own strategy for ensuring all APIs are consistently documented.

Covering The Bare Essentials That Should Exist For All APIs
I wanted to make sure each API had the bare essentials, so I took what the VA has already done over at developer.va.gov, and republished it as a static single page application that runs 100% on GitHub pages, and hosted in a GitHub repository–providing the following essential building blocks for APIs at the VA:

·       Landing Page - Giving any API a single landing page that contains everything you need to know about working with an API. The landing page can be hosted as its own repo, and subdomain, and the linked up with other APIs using a facade page, or it could be published with many other APIs in a single repository.

·       Interactive Documentation - Providing interactive, OpenAPI-driven API documentation using Swagger UI. Providing a usable, and up to date version of the documentation that developers can use to understand what the API does.

·       OpenAPI Definition - Making sure the OpenAPI behind the documentation is front and center, and easily downloaded for use in other tools and services.

·       Postman Collection - Providing a Postman Collection for the API, and offering it as more of a transactional alternative to the OpenAPI.

That covers the bases for the documentation that EVERY API should have. Making API documentation available at a single URL to a human viewable landing page, complete with documentation. While also making sure that there are two machine readable API definitions available for an API, allowing the API documentation to be more portable, and useable in other tooling and services–letting developers use the API definitions as part of other stops along the API lifecycle.

Bringing In Some Other Essential API Documentation Elements
Beyond the landing page, interactive documentation, OpenAPI, and Postman Collection, I wanted to suggest some other building blocks that would really make sure API developers at the VA are properly documenting, communicating, as well as supporting their APIs. To go beyond the bare bones API documentation, I wanted to suggest a handful of other elements, as well as incorporate some building blocks the VA already had on the API documentation landing page for the VA Facilities API.

·       Authentication - Providing an overview of authenticating with the API using the header apikey.

·       Response Formats - They already had a listing of media types available for the API.

·       Support - Ensuring that an API has at least one support channel, if not multiple channels.

·       Road Map - Making sure there is a road map providing insights into what is planned for an API.

·       References - They already had a listing of references, which I expanded upon here.

I tried not to go to town adding all the building blocks I consider to be essential, and just contribute couple of other basic items. I feel support and road map are essential and cannot be ignored, and should always be part of the minimum viable API documentation requirements. My biggest frustrations with APIs are 1) Up to date documentation, 2) No support, and 3) Not knowing what the future holds. I’d say that I’m also increasingly frustrated when I can’t get at the OpenAPI for an API, or at least find a Postman Collection for the API. Machine readable definitions moved into the essential category for me a couple years ago–even though I know some folks don’t feel the same.

A Self Contained API Documentation Blueprint For Reuse
To create the minimum viable API documentation blueprint demo for the VA, I took the HTML template from developer.va.gov, and deployed as a static Jekyll website that runs on GitHub Pages. The landing page for the documentation is a single index.html page in the root of the site, leverage Jekyll for the user interface, but driving all the content on the page from the central config.yml for the API project. Providing a YAML checklist that API developers can follow when publishing their own documentation, helping do a lot of the heavy lifting for developers. All they have to do is update the OpenAPI for the API and add their own data and content to the config.yml to update the landing page for the API. Providing a self-contained set of API documentation that developers can fork, download, and reuse as part of their work, delivering consistent API documentation across teams.

The demo API documentation blueprint could use some more polishing and comments. I will keep adding to it, and evolving it as I have time. I just wanted to share more of my thoughts about the approach the VA could take to provide function API documentation guidance, as a functional demo. Providing them with something they could fork, evolve, and polish on their own, turning it into a more solid, viable solution for documentation at the federal agency. Helping evolve how they deliver API documentation across the agency, and ensuring that they can properly scale the delivery of APIs across teams and vendors. While also helping maximize how they leverage GitHub as part of their API lifecycle, setting the base for API documentation in a way that ensures it can also be used as part of a build pipeline to deploy APIs, as well as manage, testing, secure, and helping deliver along almost every stop along a modern API lifecycle.

The website for this project is available at: https://va-working.github.io/api-documentation/ You can access the GitHub repository at: https://github.com/va-working/api-documentation


Sunday, December 23, 2018

Automated Regression Testing


Automated Regression Testing Ascertains Code Changes and Functionality Issues

by Charles Taylor https://dzone.com/articles/automated-regression-testing-ascertains-code-chang

Learn why you should automate your regression testing, plus tools and time saving tips.

Automated regression testing ascertains code changes and functionality issues. In other words, it is a quality measurement check to discover if new code complies with the old code so that the remaining unmodified code stays unaffected. Automation regression testing also allows for finding any bugs that may have occurred due to changes in the code and if the testing is not done, the product could have a critical issue occur during a live event which can lead to negative marketing impact.

There are various types of automated regression tests and they include:

  1. Unit Regression – done during the unit testing phase when a code is tested in isolation.
  2. Partial Regression – done to verify the code works fine even when the code is changed performed while the unit is integrated with the unchanged or already existing code.
  3. Complete Regression – done when a change in code is in numerous modules and/or if the change impact in any module is uncertain.

It is understood that automated regression testing is hard because for every action performed there is a reaction. A few result in successful tests but there may be another two-hundred that will lead to failure. Unfortunately, there is no one size fits all test strategy for automated regression and shortcuts that are used, have not had consistent positive results. The good news is there are some comprehensive specs, rules, and examples that countless software engineers have diligently put together for our knowledge base and application protocol. (Baril, Gounares, & Krajec, 2014)

The Reason We Have Automated Regression Testing


Automated regression testing’s intent is to speed things up, so we can increase quality and velocity simultaneously which results in obtaining the prize of all promotional tools – being the first to market. It doesn’t matter if you are releasing a new software suite, software feature or even if you wish to make sure a particular software feature is current and working properly, there are steps to take, rules to follow and regression automation tests to conduct. Common practice is to utilize a suite of four regression automation tests which perform in an exemplary manner. They are:

  1. Retest all and repeat frequently – the entire test case in the suite are re-executed to ensure there are no bugs from a change in the code. This regression test is expensive due to its expansive nature and requires more time and resources than any of the other types of automated regression testing methods.
  2. Selection testing is worth using for maintenance – test cases are selected from suites to be re-executed. The test cases are selected from code changes in the modules and have two categories – reusable and obsolete. The reusable test cases can be used in future regression cycles whereas the obsolete ones are not used in future regression cycles.
  3. Prioritization to create stability – priorities are created, and the test cases depend on the listed and needed priorities to be for product impact and functionality.
  4. Simple – a combination of regression test selection and test case prioritization. Rather than selecting the entire test suite, only test cases which are re-executed and are listed as a priority are designated.

It should be noted automated regression testing not only enables checks into various changes but can also release and prompt testers to conduct manual assessments in the more uncommon cases respective to their unique production environment.

Stakeholders are usually willing to accept automation regression testing as being a part of the final analysis of ‘completion’ for user stories being worked on and evaluated. User stories are only closed when the corresponding automated tests were run effectively and efficiently and had successful outcomes. When the feature is successfully released into production, the regression suite becomes part of the tests. In layman’s terms that means there is a stable version of tests which now exist as part of the regression suite-built layer by layer and are available whenever development of a new feature is added. (Briand, Labiche, & Soccar, 2002)

However, there is a more difficult automated regression test to perform which occurs when a feature was released into production without having any automated tests performed. The challenge then becomes finding a regression suite to put into place since you can only do that incrementally, layer by layer so prioritization is mandatory to ascertain what must be tested.

Automated Regression Testing Tools and Time Savers


There are various tools that can be used in automated regression testing which combine testing with functionality in a single platform and a couple of popular ones include Selenium and vTest. However, there is a sidebar that needs to be considered and understood when using automated regression testing tools. The implementation of the tests are faster than manual tests but be cognizant that everything else will take significant time, so preparation is the key. What does that mean? It means that writing the tests and setting up the suite needs must be prioritized, listed and understood. To help save some inefficient use of your time, we have listed some automated regression testing time savers. (Raulamo-Jurvanen, 2017)

  • Try to write individual and independent tests because you will ultimately regret it if you don’t. By not writing individual and independents tests, if an issue arises, you will find because you did not write an independent test, your solutions are problematic and must work around test orders and the storing of state and data between test runs.
  • Separate acceptance and end-to-end tests because they do entirely two different things and need to run separately to get proportions correct. Acceptance tests target and test one thing efficiently and effectively. An end to end test is implemented to cover the user’s journey through an app and then test the app the same way a user access it. The end to end tests do take more time and are considered fragile because they contain so many incremental steps.
  • If you want your test to perform brilliantly, decipher why you are doing automated testing and once you ascertain need, determine what measurements will be needed. Your end goal should be to have as few automated tests as possible and only use them for valid and objective business reasons because automated tests are time-intensive and costly.
  • Never forget that intention and implementation are two different things. When writing scenarios, it is logical to input how best to implement the set-up, but that thinking is faulty and will not help longevity within your specifications or enhance business readability. Intentional features and scenarios provide outcomes that are clear and easy to understand and if you really want to provide exemplary solutions you can even build in the ability to change your test if needed without changing your specifications.
  • Automated regression testing is not a one shot and you’re done a deal because if you don’t run them on a consistent basis, they will become almost useless when someone changes the code. The test should be in the same source control repository as the app, so they will not be forgotten about or ignored.
  • Automated tests should never be run on several browsers because almost every browser performs differently with slight variations which invalidate true results. In essence, you are probably wasting your time. Try to find the browser most of your customers will be using. Google Chrome is usually a good place to start.
  • There are nuanced differences in manual and automated testing. This sounds like a no-brainer but it’s not. Automated testing is the testing of choice for functionality, but it does not do well in testing stories or exploring your system. Automated, artificial regression testing no matter how brilliant, logical or error-free, rarely understands weird quirks or cultural definition variances. But humans can find those unique perspectives and manually test them which is more cost efficient and allows for fine-tuning for human users’ needs.
  • Try to run your automated tests as they incrementally grow and develop to speed up your run times. It takes almost no time to create an agent to run tests and collate the results on a consistent loop integrated with the testing server.
  • Use, use and use your application development team because each member should be accountable for quality. The most effective and efficient automated tests are developed with the application development team because they integrate what is needed with what can be tested with the results being successfully magnified.
  • Try to find an opportunity to extract the most value for the least amount of time and energy. If you have to keep running automated end to end testing after deployment of the product, is it a good use of a company’s outlay? Always seek value in every level of testing. Always.

Automation regression testing is one of the most important aspects in helping deliver a quality product because it makes sure that any change in the code whether it’s small or large does not affect the existing or old functionality. You can even use automaton to create master data and setup configurations for manual testers which ultimately allows you to facilitate the needs of the various operations within your company or organization. There will be new tests in automation with techniques discovered and challenges to solve. The journey to achieving optimum levels of automation in regression testing must start by taking the first step.

Thursday, December 20, 2018

Top 10 Best 3D Printing Pens in 2018

Source: https://www.toptenthebest.com/top-10-best-3d-printing-pens/
By Andrew Liu - December 11, 2018


Just a few years ago, 3D printing was a rather expensive technology that very few could afford. It was something new, everyone saw the potential in it but as far as application goes, not that many had the actual money to buy a 3D printer. Years passed by, the technology improved, fabrications costs went down and competition drove to new 3D printing products being developed. Today, 3D printing is being used in personal projects, education, engineering, medical applications and many more.
Today we will talk about the applications of 3D printing in education. Buying a 3D printer for a child is not something many parents can afford still but there are other options. Over the past couple of years, we saw the introduction of 3D printing pens. These small devices allow the user to simply draw but in 3D. By now, most 3D printing enthusiasts should already be familiar with the 3D printing pens.

Are They Worth It?

A 3D printing pen has limited applications. It lacks the precision of a regular 3D printer but it is also hundreds of times cheaper. It uses a similar concept. It takes a heating element and a plastic material that becomes soft at a certain temperature. The material hardens quickly when exposed to room temperature making it possible to draw 3D structures. It can be a good learning tool especially for children but for adults as well. We have seen many great projects posted online with objects that have been made using simple 3D printing pens.
Unfortunately there are not that many manufacturers or brands that market these tools which means that there are a limited number of models available to choose from. Fortunately we were able to select 10 different models and round them up in a simple list. With these things in mind let’s get right into our list of the top 10 best 3D printing pens in 2018 reviews.

10. SUNLU Professional 3D Printing Pen

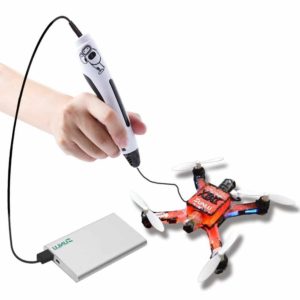
The SUNLU 3D printing pen is advertised as being a professional model. For what is worth the pen is actually made using decent materials and comes with useful features. It uses non-toxic ingredients and it does not leave and kind of hot plastic smell. It has an USB cord which means it can be powered by pretty much anything and comes with thermal control. The model has an interference detection that ensures a smooth operation and it is fairly quiet.
The fact that it has a thermal control means that it can work with ABS and PLA but the problem is it does not a speed setting or a continuous feed option. This means that it works best with PLA rather than with ABS.
Pros:
  • Easy to use
  • Thermal control
  • Filament interference detection
Cons:
  • No feed control

9. SASRL 3D Printing Pen


SASRL offers a great pen for a good price. It comes with a useful LCD screen that makes it possible to see the current operating temperature and two small buttons to adjust it. The pen works the same as any other pen with a heating element and a filament feeder. In terms of materials it works with, according to the manufacturers the pen supports only PLA. A few filaments are included in the kit of the device.
PLA is a good material to work with. It makes it easy to craft various objects and shapes but some would see the fact that it does not work with ABS as a major inconvenience.
Pros:
  • Affordable
  • Easy to use
  • Temperature control and LCD display
Cons:
  • Works only with PLA

8. CCTRO 3D Printing Pen With LCD Screen


CCTRO 3D printing pen is one of the more affordable models in our list with a decent price tag and good performance. It has a small LCD screen that shows temperature that offers better control over the melting levels. Using the buttons on the sides the temperature can be adjusted and the type of filament can be set as well as the feed speed. The model has a continuous feed as long as the button is pressed and works with both PLA and ABS plastic filaments.


The printing pend is fairly decent but it takes time to get used to it. At first, drawing a shape will prove to be difficult because of its size and how it fits in the hand. It takes slow movements and a bit of patience.

Pros:

  • Good price tag
  • Easy to use
  • Works with ABS and PLA

Cons:

  • A bit bulky takes some practice to get used to it


7. Titanium Micro RP600A Intelligent 3D Printing Pen


Titanium Micro RP600A is not he first pen developed by the manufacturer but it is one of their most popular ones. It is advertised as being a smart pen but its biggest asset is the compact form factor. The pen is quite slim and has temperature control, feed control and works with both ABS and PLA. Inside the package the manufacturers added 3 filaments of 10 feet each, an USB cable as it can be powered by a power bank or laptop and a power adapter.
One small inconvenient that the pen has is the fact that there is no way to tell what temperature it is running with. It can be adjusted but knowing the temperature seems to be a feature that was overlooked by the manufacturers.
Pros:
  •  Compact form factor
    Works with PLA and ABS
    Decent price tag
Cons:
  • There is no way to read the temperature even if it is adjustable


6. Simphee 3D Printing Pen


The Simphee 3D printing pen is a great pick for the ones that are looking for a model that managed to actually work as expected. It is a simple 3D pen with a heating element and manual temperature control. To assist with the temperature control the manufacturers added an LCD screen. In theory the model works with both PLA and ABS but the manufacturers recommend PLA. In fact the device was designed to work with low-temperature PLA filament as it is safer to work with and a bit easier to handle.
If we are to talk about flaws, the biggest problem the pen has is the design. It is very bulky. At times it might feel difficult to hold and it will take time to get used to using the 3D printing pen.
Pros:
  •  Affordable
  • Great set of features
  • Recommended for low-temperature melt PLA filament
Cons:
  • A bit bulky, more difficult to hold


5. Sunveza Professional 3D Printing Pen Kit


Sunveza offers a great 3D printing pen kit that includes everything needed to get started. Inside the pack the manufacturers included the pen, a wall plug adapter and 4 filament rolls to start creating right away. The model has temperature control and an LCD display that shows the current operating temperature. In terms of compatible materials the model can use both PLA and ABS filaments but the temperature settings are different for the two materials.
The pen itself has a rather odd shape. It is more narrow in the middle and thicker at the ends. Holding it feels a bit awkward and takes time to get used to. It is understandable as there is a heating element inside and it cannot be extremely thin but there are better designs out there.
Pros:
  • Good price tag
  • Temperature control and LCD screen
  • Works with PLA and ABS
Cons:
  • Odd shape, difficult to hold


4. AdroitOne 3D Printing Pen


The AdroitOne 3D printing pen is one of the smaller models in our list. It falls under the same price category as most other pens but it feels better in the hand when using it. The model has two buttons to control the temperature while the on button ensures a continuous filament feed. Speaking of filament the model works with ABS and PLA but both materials have different temperature settings.
Using the pen is fairly simple but it requires a bit of tweaking. The temperature settings for each material are not clearly specified in the instructions and it will take a few tries until the optimal settings are discovered.
Pros:
  • Easy to hold and use
  • Reasonable price tag
  • Temperature control
  • Works with PLA and ABS
Cons:
  • Takes a bit of time to tweak in order to get proper results


3. MYNT3D Professional Printing 3D Pen with OLED Display


MYNT3D is advertised as a professional 3D printing pen. It works quite well and the heating element inside seems to get the job done right. The pen has a small LCD screen on one of the sides which shows the current temperature. Its two side buttons that allow the temperature to be adjusted. The model comes in a large box that includes everything needed as well as some PLA filament. It can also work with ABS if PLA is not available.

Pretty much everything about this pen works as expected. What most users will notice is that the tip will need to be cleaned quite often. The solidified plastic will block the tip and will need to be opened from time to time.
Pros:
  • LCD display and temperature control
  • Works with PLA and ABS
  • Easy to use and hold
Cons:
  • Needs to have the tip cleaned quite often


2. 3Doodler Create 3D Pen With 50 Plastic Strands


The 3Doodler Create 3D printing pen is one of the best products on the market. It was made to be easy to use and work as expected. The device has a simple design that actually makes it feel like a pen when holding it. It is slim, light and it is relatively quiet when used. The model works with ABS plastic filaments. 25 filaments are actually included in the kit. In terms of precision, the pen uses 3mm filaments which are not as slim but they are easier to work with.
For the most part, the 3Doodler pen does not have any major problems. What some might see as a con is the absence of temperature control. The manufacturers made the device operate at a standard temperature for the 3 mm ABS filaments.
Pros:
  • Slim, quiet, easy to hold
  • Good precision, continuous feed
  • Easy to clean the tip
Cons:   
  • No temperature control


1. Soyan 3D Printing Pen


Soyan 3D Printing Pen is one of the most popular models in our list. It is also one of the cheapest but surprisingly it works decently well as long as the right type of filaments is used. The model can work with 1.7 mm ABS filaments. It is relatively quiet and feels good in the hand. Its heating element works quite well and the feeder works continuously if the on button is pressed down.
The pen itself works like any other normal pen. It does not have a lot of issues which is great especially for the price. What most people that never used a 3D printing pen will need some time to get used to it. It is a bit bulky and there are other models that are a bit more compact and slim.
Pros:
  • Low price tag
  • Easy to use and straight forward
  • Does not get clogged as often as other models
Cons:
  • Takes a bit of time to get used to


Things To Keep In Mind

3D printing pens usually work with either ABS or PLA. These two materials have different melting temperatures. In order to use both of them with the same device, the pen needs to have adjustable temperature and an LCD screen in order to see the current temperature. This is an important aspect to keep in mind otherwise it is best to use only the material recommended by the manufacturer of the pen.
Another thing that needs to be known by the ones that did not use a 3D printing pen before is the maintenance part. The tip of every 3D pen tends to get clogged with hardened ABS or PLA that needs to be removed. This happens with all the pens but with some they are easier to clean than others. Our list does include some models that are easier to clean than others.