Source: https://dzone.com/articles/consuming-rest-api-with-reactjs
In this post, we go through a tutorial on how to create a React application that can perform CRUD functions and take in data from a RESTful API.
Recently we have experienced rapid growth
of mobile, Internet-based communication. We have smartphones, tablets,
netbooks, and other connected devices that create a need to serve
appropriate content for each specific front-end profile. Also, the
Internet is becoming available for new regions and social groups,
constantly increasing web traffic. On the other side, users' computers
and browsers, and JavaScript itself are getting more and more powerful,
providing more possibilities for processing data on the web via the
client-side. In this situation, the best solution can often be to send
data as the response, instead of sending page content. That is, we don't
need to reload the whole page on each request, but send back the
corresponding data and let the client (front-end stuff) process the
data.
We can develop a backend application exposing a
remote API (usually based on the REST protocol) and a front-end (usually
JavaScript) application, which communicates with the API and renders
all the data on the device.
If backend data is consumed by humans, we need
to develop a user interface (UI) to provide the possibility for users to
manage the data. Modern web applications should have responsive and
friendly UIs, ensuring adequate user experience. Also, modern UIs can be
arbitrarily complex, with multi-panel, nested layouts, paging, progress
bars, etc. In this case, the component model can be the right solution.
React.js is a light-weight JavaScript framework, which is oriented
toward the creation of component-based web UIs. React doesn't provide
any means for communicating with the backend, but we can use any
communication library from inside React components.
As an example, we can develop a simple React application consuming the REST API we created in a previous article.
The API provides methods to use an online collection management
application. Now our task is to develop a web UI to use these methods.
Before starting development, we need to set up a React.js development environment.
1. React.js Development Environment Set Up
There are several ways to use React.js. The
simplest way is just to include React libraries in the <script>
tags on the page.
Listing 1.1. Including the React.js library in the HTML page:
<html lang="en" dir="ltr">
<head>
<meta charset="utf-8">
<title></title>
</head>
<body>
<div id="hello_container" class=""></div>
<script src="https://unpkg.com/react@16/umd/react.development.js" crossorigin></script>
<script src="https://unpkg.com/react-dom@16/umd/react-dom.development.js" crossorigin></script>
<script>
class Hello extends React.Component {
constructor(props) {
super(props);
}
render() {
return React.createElement(
'div',
null,
`Hello ${this.props.name}!`
);
}
}
ReactDOM.render(React.createElement(Hello, {name: 'React'}, null), document.querySelector('#hello_container'));
</script>
</body>
</html>
This way, we can very quickly start developing React applications, but we cannot use certain advanced features, like JSX, for example. So, a more appropriate solution, especially for large and sophisticated applications, would be to use the
create-react-app tool. To install it, you need Node.js and npm to be installed on your computer: npm install -g create-react-app
Then you can run the following command in the root directory, where you want to create your project:
.../project-root>create-react-app consuming-rest
This command creates a new folder ('consuming-rest') with a ready-to-run prototype React application.
Now we can enter the directory and run the application, as follows:
.../project-root>cd consuming-rest.../project-root/consuming-rest>npm start
This starts the application in a new browser at http://localhost:3000:
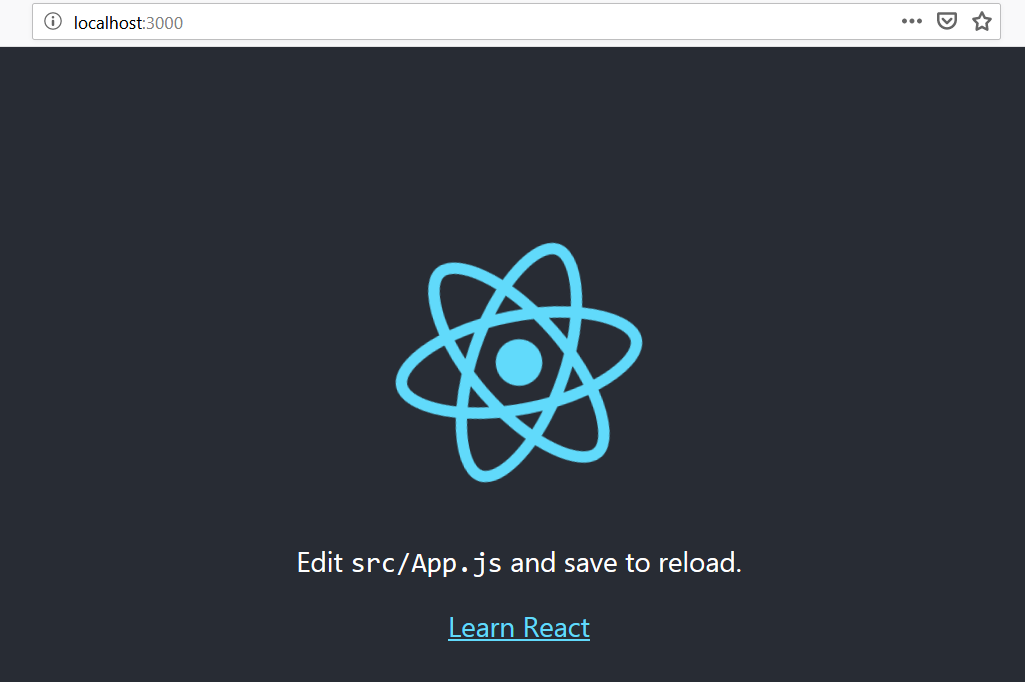
It is a trivial but completely functional front-end application, which we can use as a prototype for creating our UI.
Initially, we can implement a data service to communicate with the server.
2. Backend Communication Service Implementation
In general, it is a good idea to put all
related functionalities in one place. Putting our functionality behind a
service which exposes certain APIs ensures more flexibility and
testability for our application. So, we create a communication service
class, which implements all basic CRUD operations for data exchange with
the server and exposes these operations as methods for all React
components. To make our UI more responsive, we implement the methods as
asynchronous. Provided the API is unchanged, we can change the
implementation freely and none of the consumers will be affected. To put
these concepts into practice, let's create a mock implementation of the
service, which provides mock data for building and testing our UI. Our
mock service can look like this.
Listing 2.1. src/shared/mock-item-service,js – mock ItemService:
class ItemService {
constructor() {
this.items = [
{link:1, name:"test1", summary:"Summary Test 1", year:"2001", country:"us", price:"1000", description:"Desc 1"},
{link:2, name:"test2", summary:"Summary Test 2", year:"2002", country:"uk", price:"2000", description:"Desc 2"},
{link:3, name:"test3", summary:"Summary Test 3", year:"2003", country:"cz", price:"3000", description:"Desc 3"},
];
}
async retrieveItems() {
return Promise.resolve(this.items);
}
async getItem(itemLink) {
for(var i = 0; i < this.items.length; i++) {
if ( this.items[i].link === itemLink) {
return Promise.resolve(this.items[i]);
}
}
return null;
}
async createItem(item) {
console.log("ItemService.createItem():");
console.log(item);
return Promise.resolve(item);
}
async deleteItem(itemId) {
console.log("ItemService.deleteItem():");
console.log("item ID:" + itemId);
}
async updateItem(item) {
console.log("ItemService.updateItem():");
console.log(item);
}
}
export default ItemService;
Based on this, we can build the UI.
3. CRUD UI Implementation
React supports component hierarchies, where each
component can have a state and the state can be shared between related
components. Also, each component's behavior can be customized by passing
properties to it. So, we can develop the main component, which contains
the list of collection items and works as the placeholder for
displaying forms for corresponding CRUD actions. Using the stuff
generated by the create-react-app tool, we change the content of app.js
as follows.
Listing 3.1. src/App.js – the main component as the application frame:
import React, { Component } from 'react';
import './App.css';
import ItemDetails from './item-details';
import NewItem from './new-item';
import EditItem from './edit-item';
import ItemService from './shared/mock-item-service';
class App extends Component {
constructor(props) {
super(props);
this.itemService = new ItemService();
this.onSelect = this.onSelect.bind(this);
this.onNewItem = this.onNewItem.bind(this);
this.onEditItem = this.onEditItem.bind(this);
this.onCancel = this.onCancel.bind(this);
this.onCancelEdit = this.onCancelEdit.bind(this);
this.onCreateItem = this.onCreateItem.bind(this);
this.onUpdateItem = this.onUpdateItem.bind(this);
this.onDeleteItem = this.onDeleteItem.bind(this);
this.state = {
showDetails: false,
editItem: false,
selectedItem: null,
newItem: null
}
}
componentDidMount() {
this.getItems();
}
render() {
const items = this.state.items;
if(!items) return null;
const showDetails = this.state.showDetails;
const selectedItem = this.state.selectedItem;
const newItem = this.state.newItem;
const editItem = this.state.editItem;
const listItems = items.map((item) =>
<li key={item.link} onClick={() => this.onSelect(item.link)}>
<span className="item-name">{item.name}</span> | {item.summary}
</li>
);
return (
<div className="App">
<ul className="items">
{listItems}
</ul>
<br/>
<button type="button" name="button" onClick={() => this.onNewItem()}>New Item</button>
<br/>
{newItem && <NewItem onSubmit={this.onCreateItem} onCancel={this.onCancel}/>}
{showDetails && selectedItem && <ItemDetails item={selectedItem} onEdit={this.onEditItem} onDelete={this.onDeleteItem} />}
{editItem && selectedItem && <EditItem onSubmit={this.onUpdateItem} onCancel={this.onCancelEdit} item={selectedItem} />}
</div>
);
}
getItems() {
this.itemService.retrieveItems().then(items => {
this.setState({items: items});
}
);
}
onSelect(itemLink) {
this.clearState();
this.itemService.getItem(itemLink).then(item => {
this.setState({
showDetails: true,
selectedItem: item
});
}
);
}
onCancel() {
this.clearState();
}
onNewItem() {
this.clearState();
this.setState({
newItem: true
});
}
onEditItem() {
this.setState({
showDetails: false,
editItem: true,
newItem: null
});
}
onCancelEdit() {
this.setState({
showDetails: true,
editItem: false,
newItem: null
});
}
onUpdateItem(item) {
this.clearState();
this.itemService.updateItem(item).then(item => {
this.getItems();
}
);
}
onCreateItem(newItem) {
this.clearState();
this.itemService.createItem(newItem).then(item => {
this.getItems();
}
);
}
onDeleteItem(itemLink) {
this.clearState();
this.itemService.deleteItem(itemLink).then(res => {
this.getItems();
}
);
}
clearState() {
this.setState({
showDetails: false,
selectedItem: null,
editItem: false,
newItem: null
});
}
}
export default App;
Note that, for now, our app component uses the mock service we created in section 2:
. . .
import ItemService from './shared/mock-item-service';
. . .
Then we will create nested components for basic operations with collection items.
Listing 3.2. src/new-item.js – creating new collection items:
import React, { Component } from 'react';
import './App.css';
import Validator from './shared/validator';
class NewItem extends Component {
constructor(props) {
super(props);
this.validator = new Validator();
this.onCancel = this.onCancel.bind(this);
this.onSubmit = this.onSubmit.bind(this);
this.handleInputChange = this.handleInputChange.bind(this);
this.state = {
name: '',
summary: '',
year: '',
country: '',
description: ''
};
}
handleInputChange(event) {
const target = event.target;
const value = target.value;
const name = target.name;
this.setState({
[name]: value
});
}
onCancel() {
this.props.onCancel();
}
onSubmit() {
if(this.validator.validateInputs(this.state)) {
this.props.onSubmit(this.state);
}
}
render() {
return (
<div className="input-panel">
<span className="form-caption">New item:</span>
<div>
<label className="field-name">Name:<br/>
<input value={this.state.name} name="name" maxLength="40" required onChange={this.handleInputChange} placeholder="item name" />
</label>
</div>
<div>
<label className="field-name">Summary:<br/>
<input value={this.state.summary} name="summary" maxLength="40" required onChange={this.handleInputChange} placeholder="summary" />
</label>
</div>
<div>
<label className="field-name">Year:<br/>
<input value={this.state.year} name="year" maxLength="4" pattern="[0-9]{1,4}" onChange={this.handleInputChange} placeholder="year" />
</label>
</div>
<div>
<label className="field-name">Country:<br/>
<input value={this.state.country} name="country" maxLength="2" pattern="[a-z|A-Z]{2}" onChange={this.handleInputChange} placeholder="country code" />
</label>
</div>
<div>
<label className="field-name">Description:<br/>
<textarea value={this.state.description} name="description" onChange={this.handleInputChange} placeholder="description" />
</label>
</div>
<br/>
<button onClick={() => this.onCancel()}>Cancel</button>
<button onClick={() => this.onSubmit()}>Create</button>
</div>
);
}
}
export default NewItem;
In Listing 3.2, we use the
validator class,
which provides a simple validation for newly created or edited
collection items. This class can be shared between components, i.e. it
can be used in NewItem and EditItem components in our case.
Listing 3.3. src/shared/validatior.js – a simple validation for the item form:
class Validator {
validateInputs(inputData) {
let errorMsg = "";
if(!inputData.name) {
errorMsg +="Please enter name of this item.\n"
}
if(!inputData.summary) {
errorMsg +="Please enter summary of this item.\n"
}
if(inputData.year.toString().match(/[^0-9]/g)) {
errorMsg +="Year must be a number.\n"
}
if(inputData.country.length > 0 && !inputData.country.match(/^[a-z|A-Z][a-z|A-Z]$/)) {
errorMsg +="Country code must be two letters.\n"
}
if(errorMsg.length == 0){
return true;
} else {
alert(errorMsg);
return false;
}
}
}
export default Validator;
Listing 3.4. src/item-details.js – viewing item details:
import React, { Component } from 'react';
import './App.css';
class ItemDetails extends Component {
constructor(props) {
super(props);
this.onEdit = this.onEdit.bind(this);
this.onDelete = this.onDelete.bind(this);
}
render() {
const item = this.props.item;
return (
<div className="input-panel">
<span className="form-caption">{ item.name}</span>
<div><span className="field-name">Name:</span><br/> {item.name}</div>
<div><span className="field-name">Summary:</span><br/> {item.summary}</div>
<div><span className="field-name">Year:</span><br/> {item.year}</div>
<div><span className="field-name">Country:</span><br/> {item.country}</div>
<div><span className="field-name">Description:</span><br/> {item.description}</div>
<br/>
<button onClick={() => this.onDelete()}>Delete</button>
<button onClick={() => this.onEdit()}>Edit</button>
</div>
);
}
onEdit() {
this.props.onEdit();
}
onDelete() {
const item = this.props.item;
if(window.confirm("Are you sure to delete item: " + item.name + " ?")) {
this.props.onDelete(item.link);
}
}
}
export default ItemDetails;
Listing 3.5. src/edit-item.js – editing existing items:
import React, { Component } from 'react';
import './App.css';
import Validator from './shared/validator';
class EditItem extends Component {
constructor(props) {
super(props);
this.validator = new Validator();
this.onCancel = this.onCancel.bind(this);
this.onSubmit = this.onSubmit.bind(this);
this.handleInputChange = this.handleInputChange.bind(this);
const itemToEdit = props.item;
this.state = {
name: itemToEdit.name,
summary: itemToEdit.summary,
year: itemToEdit.year,
country: itemToEdit.country,
description: itemToEdit.description,
link: itemToEdit.link
};
}
handleInputChange(event) {
const target = event.target;
const value = target.value;
const name = target.name;
this.setState({
[name]: value
});
}
onCancel() {
this.props.onCancel();
}
onSubmit() {
if (this.validator.validateInputs(this.state)) {
this.props.onSubmit(this.state);
}
}
render() {
return (
<div className="input-panel">
<span className="form-caption">Edit item:</span> <span>{this.state.name}</span>
<div>
<label className="field-name">Name:<br/>
<input value={this.state.name} name="name" maxLength="40" required onChange={this.handleInputChange} placeholder="item name" />
</label>
</div>
<div>
<label className="field-name">Summary:<br/>
<input value={this.state.summary} name="summary" maxLength="40" required onChange={this.handleInputChange} placeholder="summary" />
</label>
</div>
<div>
<label className="field-name">Year:<br/>
<input value={this.state.year} name="year" maxLength="4" pattern="[0-9]{1,4}" onChange={this.handleInputChange} placeholder="year" />
</label>
</div>
<div>
<label className="field-name">Country:<br/>
<input value={this.state.country} name="country" maxLength="2" pattern="[a-z|A-Z]{2}" onChange={this.handleInputChange} placeholder="country" />
</label>
</div>
<div>
<label className="field-name">Description:<br/>
<textarea value={this.state.description} name="description" onChange={this.handleInputChange} placeholder="description" />
</label>
</div>
<br/>
<button onClick={() => this.onCancel()}>Cancel</button>
<button onClick={() => this.onSubmit()}>Update</button>
</div>
);
}
}
export default EditItem;
Here we use the lifting-state-up approach.
Instead of maintaining state in each child component and synchronizing
the states, and hence the appearance of related components, we lift the
shared state up to their closest common ancestor. So, we maintain state
in the parent
app component
with the usage of callback functions which are passed to child
components via properties. Then we call the callback functions inside
event handlers in the child components. In these functions, we change
the parent component state correspondingly to the user actions triggered
in the child components. Based on the parent component state change,
React rerenders child components, if appropriate. For example, see how
theApp.onEditItem() method is called in theItemDetails.onEdit() event handler, which is triggered when the user clicks the Edit button.
This way, we have one-point state management that makes our UI model more consistent.
Note: Redux technology provides an even more
consistent and effective way of managing component model
state, especially in large applications.
Provided we have all the scripts in place, we can see the main application at http://localhost:3000:
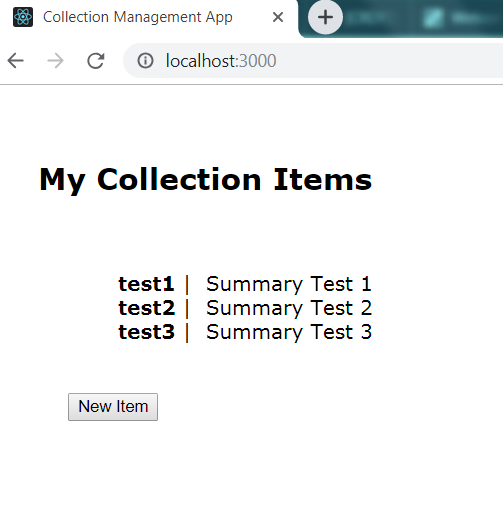 By clicking on an item in the list, we can see the item details: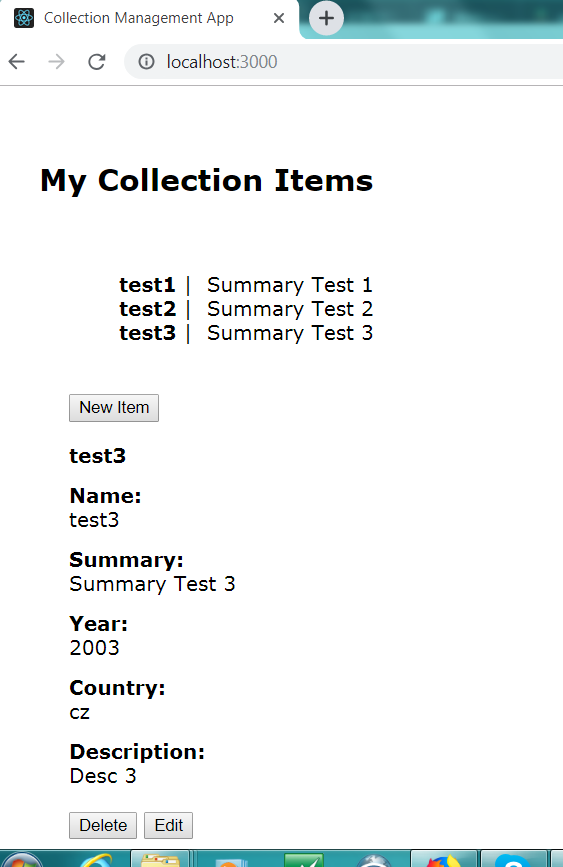
If we need to edit an item, we can make the detail view editable with the Edit button:
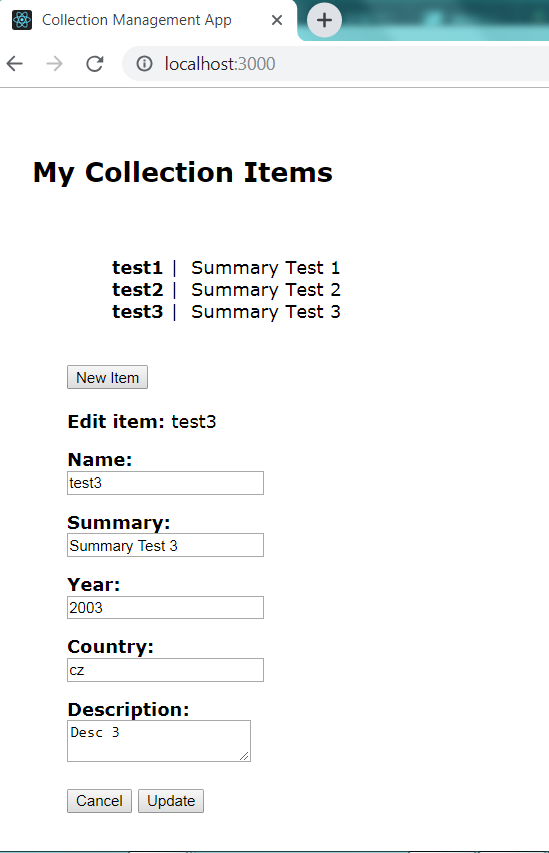
Also, we can add new items with the New Item button:
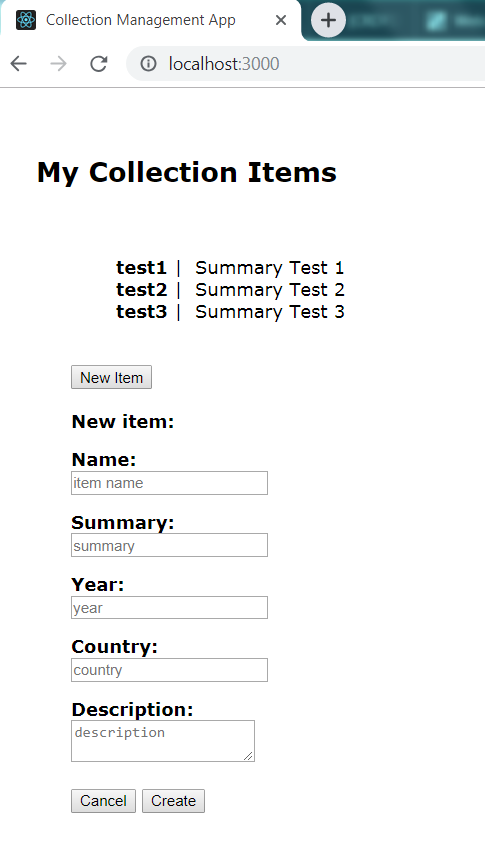
To have our UI really functional, we need to make it exchange data with the backend.
4. Real Communication
While React doesn't provide any built-in
support for sending requests to the server, we are free to use any
communication library inside our React applications. Let's use Fetch
API, which is becoming a standard way to send HTTP requests and is
supported in most modern browsers. Provided we have our communication
interface defined, we can easily substitute our mock service
implementation (see section 2) with a fully functional version, like the
following.
Listing 4.1. src/shared/item-service,js – real functional version of ItemService:
import Configuration from './configuration';
class ItemService {
constructor() {
this.config = new Configuration();
}
async retrieveItems() {
return fetch(this.config.ITEM_COLLECTION_URL)
.then(response => {
if (!response.ok) {
this.handleResponseError(response);
}
return response.json();
})
.then(json => {
console.log("Retrieved items:");
console.log(json);
const items = [];
const itemArray = json._embedded.collectionItems;
for(var i = 0; i < itemArray.length; i++) {
itemArray[i]["link"] = itemArray[i]._links.self.href;
items.push(itemArray[i]);
}
return items;
})
.catch(error => {
this.handleError(error);
});
}
async getItem(itemLink) {
console.log("ItemService.getItem():");
console.log("Item: " + itemLink);
return fetch(itemLink)
.then(response => {
if (!response.ok) {
this.handleResponseError(response);
}
return response.json();
})
.then(item => {
item["link"] = item._links.self.href;
return item;
}
)
.catch(error => {
this.handleError(error);
});
}
async createItem(newitem) {
console.log("ItemService.createItem():");
console.log(newitem);
return fetch(this.config.ITEM_COLLECTION_URL, {
method: "POST",
mode: "cors",
headers: {
"Content-Type": "application/json"
},
body: JSON.stringify(newitem)
})
.then(response => {
if (!response.ok) {
this.handleResponseError(response);
}
return response.json();
})
.catch(error => {
this.handleError(error);
});
}
async deleteItem(itemlink) {
console.log("ItemService.deleteItem():");
console.log("item: " + itemlink);
return fetch(itemlink, {
method: "DELETE",
mode: "cors"
})
.then(response => {
if (!response.ok) {
this.handleResponseError(response);
}
})
.catch(error => {
this.handleError(error);
});
}
async updateItem(item) {
console.log("ItemService.updateItem():");
console.log(item);
return fetch(item.link, {
method: "PUT",
mode: "cors",
headers: {
"Content-Type": "application/json"
},
body: JSON.stringify(item)
})
.then(response => {
if (!response.ok) {
this.handleResponseError(response);
}
return response.json();
})
.catch(error => {
this.handleError(error);
});
}
handleResponseError(response) {
throw new Error("HTTP error, status = " + response.status);
}
handleError(error) {
console.log(error.message);
}
}
export default ItemService;
Here we also follow the single-responsibility principle and put all configuration settings into one object,
Configuration, which can be imported into all relevant components.
Now we have all the basic modules developed and can put all the things together and run our application.
5. Running the Front-End Application
Provided we have our backend running on http://localhost:8080, we can set its URL in the configuration class.
Listing 5.1. Configuration class – one-point application configuration:
class Configuration {
ITEM_COLLECTION_URL = "http://localhost:8080/collectionItems";
}
export default Configuration;
And start up our application:
.../project-root/consuming-rest>npm start
This time, we see the main application screen with real data from the backend:
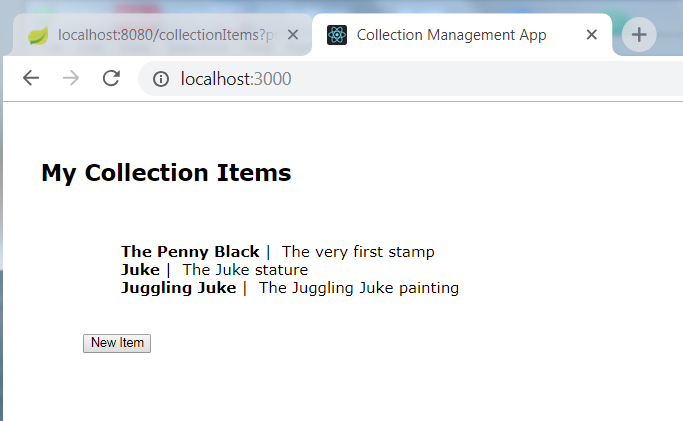
We can add new items, like the following screenshot illustrates:
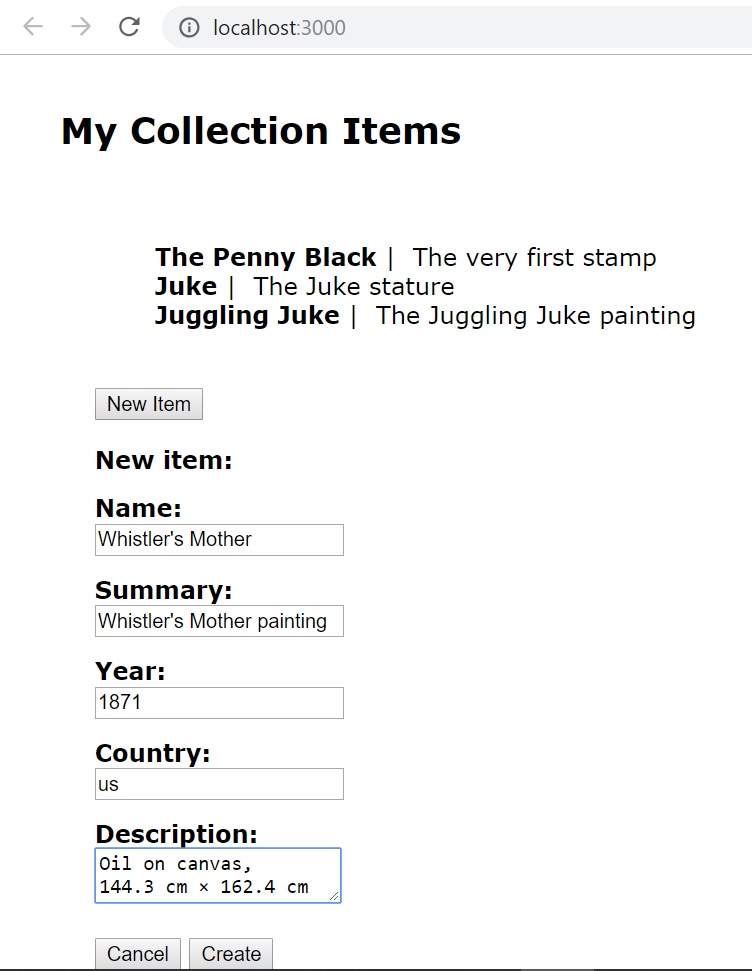
New item added:
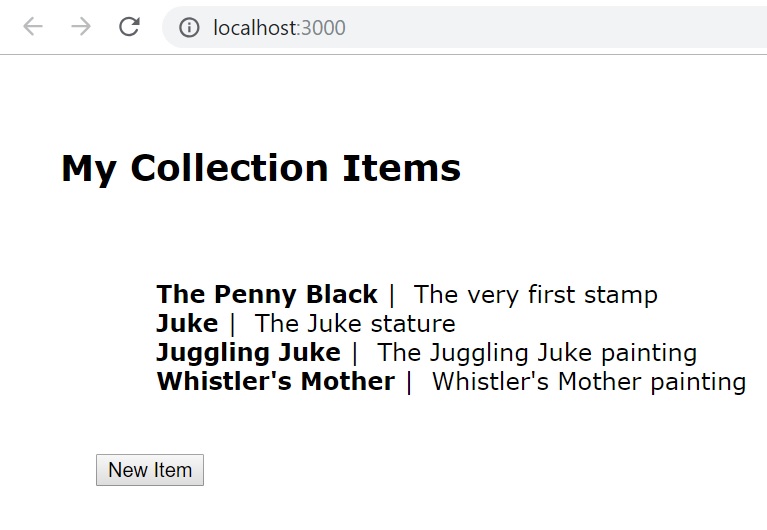
So, we have developed a fully functional web
application, which supports main collection management operations, i.e.
the ability to add, view, update, and delete items. Using the React
component model, we can create sophisticated UIs with nested, multi-page
views, providing a rich user experience. More details can be found at
the React.js official site and sites for related technologies, like:
